Thankfully, though, this problem is pretty fixable, and the following are the two solutions that have proven to be most effective in resolving this problem:
Solution 1: Resetting and then re-configuring your power settings
In most cases, the root of this problem are customized power plan settings – if you have custom power settings and you upgrade to a newer version of Windows, the new Operating System may not be able to cope with and support your custom power settings and, as a consequence, cause your computer to go to sleep after every 1-4 minutes of inactivity. If this is what is causing this issue in your case, you can fix it by resetting and then re-configuring your power settings. To do so, you need to: Open the Start Menu. Click on Settings. Click on System. Navigate to Power & sleep in the left pane. In the right pane, click on Additional power settings. Select Choose when to turn off the display. Click on Change advanced power settings. Click on Restore plan defaults.
Once you do so, you need to re-configure all of your power settings – including the one that dictates the amount of time of inactivity after which your computer goes to sleep – and these settings will then work as they are supposed to.
Solution 2: Fix the problem by editing your registry
Many affected users have also had luck with applying a certain fix to their registry and then configuring custom power settings to make sure that your computer only goes to sleep after a longer period of inactivity. To do so, you need to: Press Windows Logo key + R to launch a Run Type regedit into the Run dialog and press Enter. In the left pane of the Registry Editor, navigate to the following directory: In the right pane of the Registry Editor, double-click on a value named Attributes to modify it. Replace whatever is in this value’s Value data field with 2. Click on OK. Exit the Registry Editor.
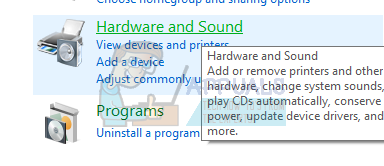
Once you have applied the registry fix, you need to change your system unattended sleep timeout to a longer period of time. To do so, you need to: Open the Start Menu. Search for “power options”. Click on the search result titled Power Options. Click on Change plan settings under your selected power plan. Click on Change advanced power settings. Click on Change settings that are currently unavailable. Click on Sleep. Select System unattended sleep timeout. The value for this setting will probably be set to 2 minutes – change it to something longer, for example, 30 minutes. Also, click on “Hibernate After” and then select a longer period of time such as 30 minutes.
Apply and save the changes you have made, exit, and the problem should have been fixed.
Solution 3: Checking Screensaver Settings
Screensaver utility is known to cause potential problems related to your sleeping. The screensaver is a utility present in Windows which allows your computer to go into a sleep mode to preserve energy. The computer is running in the background but with minimum usage and the screen is turned off. Improper configuration of this setting might cause discrepancies and hence, cause the problem. We can try disabling it and check if the problem still persists.
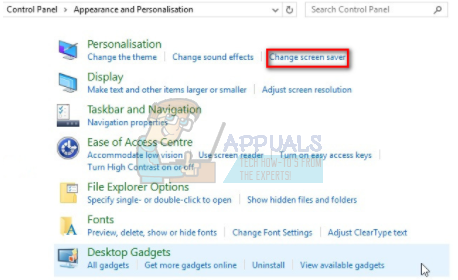
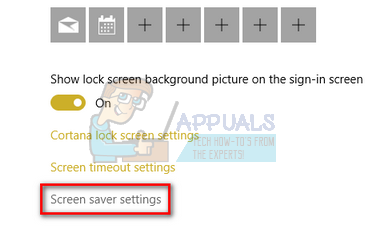
If your Windows is updated to the latest version, you might not find the settings of the screensaver in the default location as in the past. Follow the steps below.
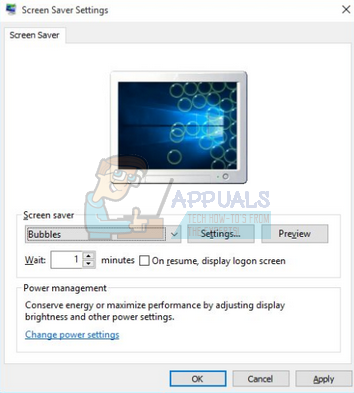
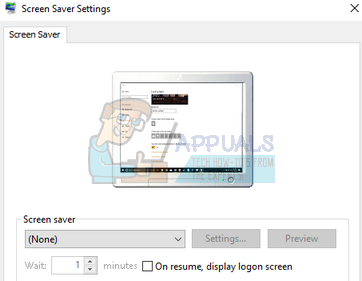
Note: You can also set the screensaver time to a very large number if you don’t want to remove it completely. There was another glitch present in the system where the fix reported by the users was to set all the power settings as you want, select another screensaver, save changes, then select the blank screensaver again and save changes for the final time. Here we are temporarily selecting another screensaver so the settings are updated properly when we set our blank screensaver. Also, make sure that the screen timeout is set as 30 minutes + for both (powered and battery).
Solution 4: Disabling all Themes
Themes can be characterized as a bundle of settings consisting of a font, wallpaper, sounds, cursor and sometimes, even screensaver. It is possible that you have a theme installed and activated on your Windows which is causing your computer to sleep every once in a while. You can disable all the themes and reset the settings to default so the computer sticks to the default configuration done (it is assumed that you have already set the sleep time higher than 2-3 minutes when the problem is occurring).
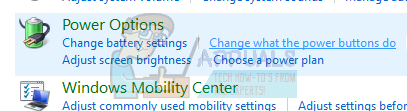
Solution 5: Changing What the Power Buttons Do
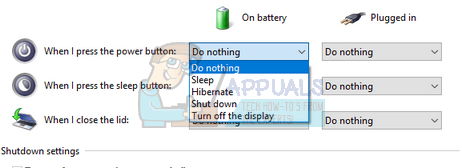
There are advanced power options available on Windows to make sure you have complete accessibility on what you can change. Sometimes these very features tend to be the root of the problem. In this solution, we will change the advanced power options and make all the power buttons do “nothing” in the “what the power buttons do” option.
Solution 6: Downloading Third-Party Software
If all the above methods don’t work, you can try downloading third-party software like MouseJiggler etc. to keep your computer from sleeping. This program fakes mouse movements every minute or so which triggers the action from the user; this activity makes the system believe that a user is moving the mouse; hence your computer doesn’t go into sleep mode. Note: Appuals have no affiliations with any third-party software. All the software listed are for the pure information of the reader. Install and use them at your own risk. The Enable jiggle option enables jiggling your mouse whenever it is not in use. You can check this option and leave your mouse still and see the effect for yourself. The Zen jiggle option makes the mouse move “virtually”; the mouse doesn’t move in the screen in front of you but the system still thinks it is moving.
Solution 7: Using the Projection menu
Some users have pointed out that they were able to prevent their system from going to sleep by using the Project menu. This is especially helpful for those users that are only encountering this behavior when they connect their computer to an external TV source. The Project menu can be accessed by pressing the Windows + P command. Most users report that they managed to resolve the issue by using the Project menu to the option Projector Only, Extend or Second Screen Only.
G2A PAY Apparently Charges Users 1€ After 180 Days of InactivityApplication Suspending in 15 Minutes PS4? Try These FixesFirst 13 Minutes of The Callisto Protocol Leaks OnlineSOLVED: Windows Live Mail 2012 Will Not Open After upgrading to Windows 10