After investigating this particular issue thoroughly, it turns out that there are several different underlying causes that are known to cause this particular error on Windows 10. Here’s a list of potential culprits: Now that you are familiar with every potential cause of the code 0x800b0101, here’s a list of potential fixes that other affected users have successfully used to get to the bottom of this issue:
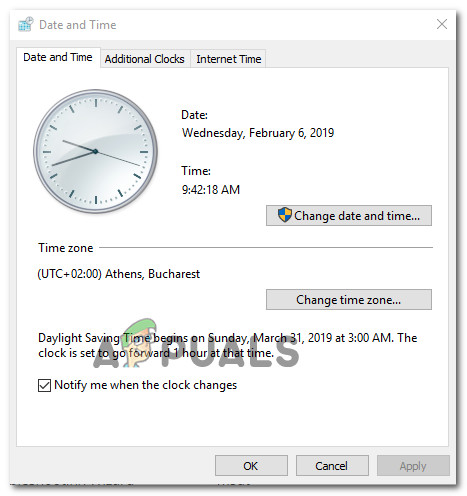
1. Change the Date & Time to correct values
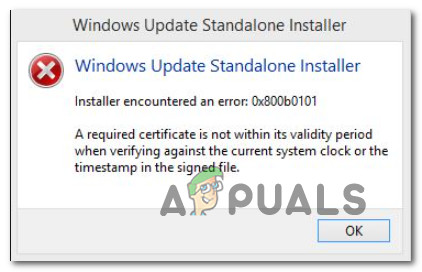
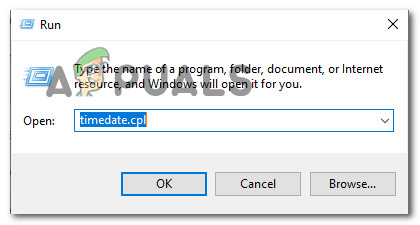
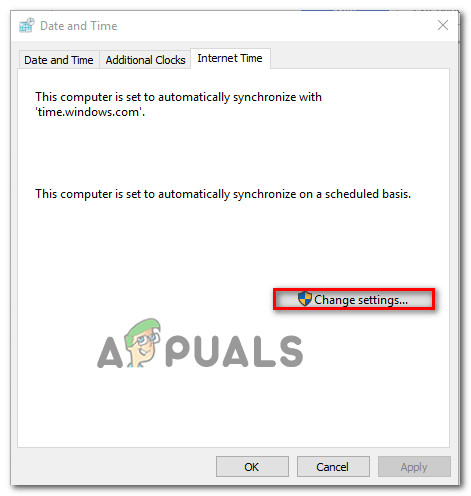
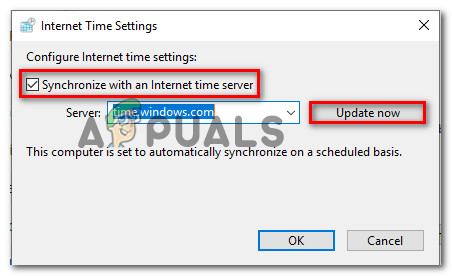
As the message of this error is pointing out, chances are this error is occurring due to a security certificate that fails to be validated by WU because the time or date (or both) is way off from the values expected by the validation server. There aren’t a lot of conditions that you (as a visitor) need to meet in order to be allowed to download pending Windows Updates, but passing the timestamp check is one of them. Go ahead and check if your system’s date & time is not off by a manner of days (or months, or years). If it is, here’s a quick guide on how to ensure that you’re using the correct time and date: If the same error occurs while attempting to use the Windows Update Standalone installer, move down to the next potential fix below.
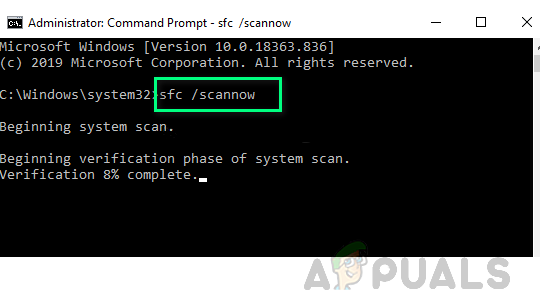
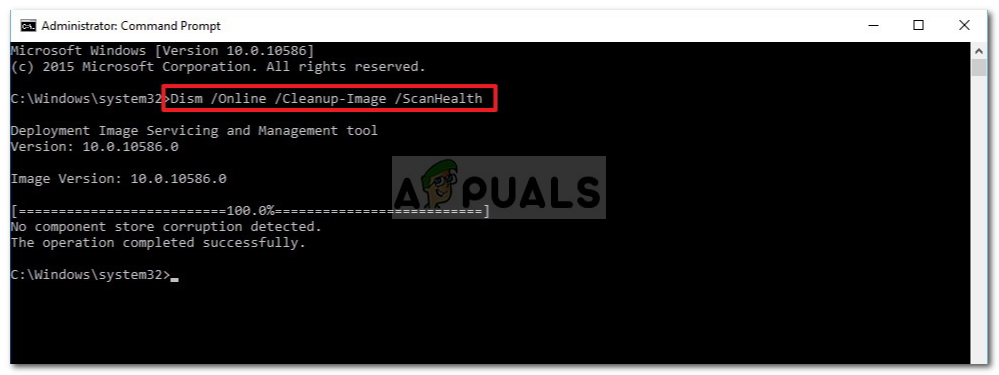
2. Run the SFC and DISM scans
Since the issue is most likely related to some kind of corruption affecting either Windows Update or Windows Installer, one of the troubleshooting fixes that you should definitely explore is to scan for any corrupted Windows files. To do this, you’ll need to run a couple of scans with two built-in utilities – System File Checker (SFC) and Deployment Image Servicing and Management(DISM). Note: These two tools share some similarities, but they are not meant to replace one another. We recommend that you run both scans in quick succession in order to improve your chance of fixing the corrupted system files. You should start with a simple SFC scan. Note: This tool is entirely local, so you won’t be required to be actively connected to the Internet. Important: Once you initiate this procedure, it’s very important to not close the CMD window even if the utility looks like it froze. Wait until the process is complete because interrupting the operation might cause logical errors on your HDD/SSD. Once the SFC scan is completed successfully, go ahead and reboot your computer and see if the issue is fixed once the next computer startup is complete by attempting to perform the action that was previously triggering the 0x800b0101 error. I the same error is still popping up when you do this, deploy a DISM scan and follow the on-screen prompts to complete the operation. Note: Different from SFC, this tool uses a sub-component of Windows Update to download healthy equivalents to replace corrupted system files. Because of this, you need to make sure that you have reliable Internet before initiating this operation. Once the DISM scan has been completed successfully, restart your computer once again and see if the 0x800b0101 error is now fixed. In case you’re still dealing with the same issue, move down to the next potential fix below.
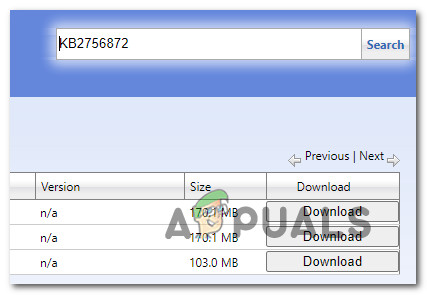
3. Use the Windows Update Catalog (if applicable)
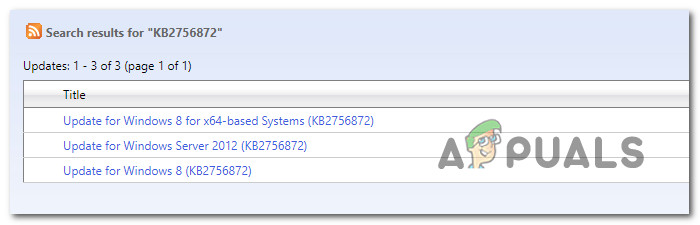
If you are seeing this error while trying to install a pending update for System Center Configuration Manager, the error 0x800b0101 is most likely occurring due to the missing of a few critical updates that need to be installed in first – Update KB2756872 and KB2749655. If this scenario is applicable in your particular case, follow the instructions below to utilize the Microsoft Update Catalog to download and install the required updates first (before installing the System Center Configuration Manager update) If you’re looking for step by step instructions on how to do this, follow the instructions below: Note: If you don’t know your OS architecture, right-click on This PC in File Explorer and choose Properties from the context menu. Next, from the list of results, look at the System type and check the bit version of your OS. If this particular scenario was not applicable to your particular situation, move down to the next potential fix below.
4. Download the latest version of AccountRight (if applicable)
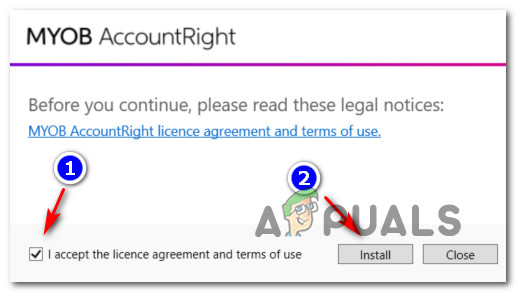
If you are encountering the 0x800b0101 while attempting to update or install AccountRight, it’s almost certain that the problem occurs due to a badly written security certificate that got attached to the application version available for download. This is due to a mess-up by AccountRight developers that assigned a years old expiration date. Fortunately, the issue was since fixed, so the problem can be responded to simply by downloading the patched version of AccountRight. If you find yourself in this particular scenario, follow the instructions below to download & install the correct version of AccountRight:
Resolve Windows Update Error 80240025How to Resolve ‘Virus Definitions Update Failed’ in Avast Antivirus?Resolve Volsnap.sys Blue Screen Error (BSOD) on Windows 10How to Resolve the uTorrent Disk Overloaded Error in Windows?