We’ve investigated this issue thoroughly and we’ve discovered that there are several underlying issues that might produce this error code on Windows 11 systems. Here’s a list of scenarios that might render the Microphone capabilities on Windows 11 unusable: Now that we went over every potential culprit that might be responsible for this issue, let’s go over every confirmed fix that other affected users have successfully used to resolve this problem on Windows 11:
Run the Recording Audio Troubleshooter
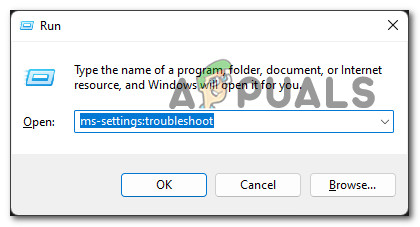
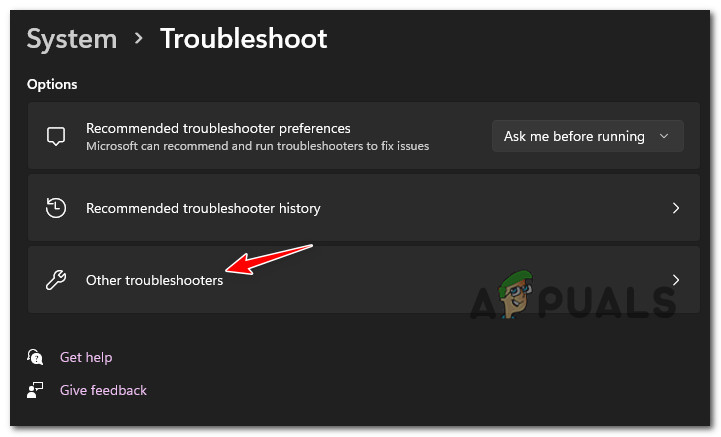
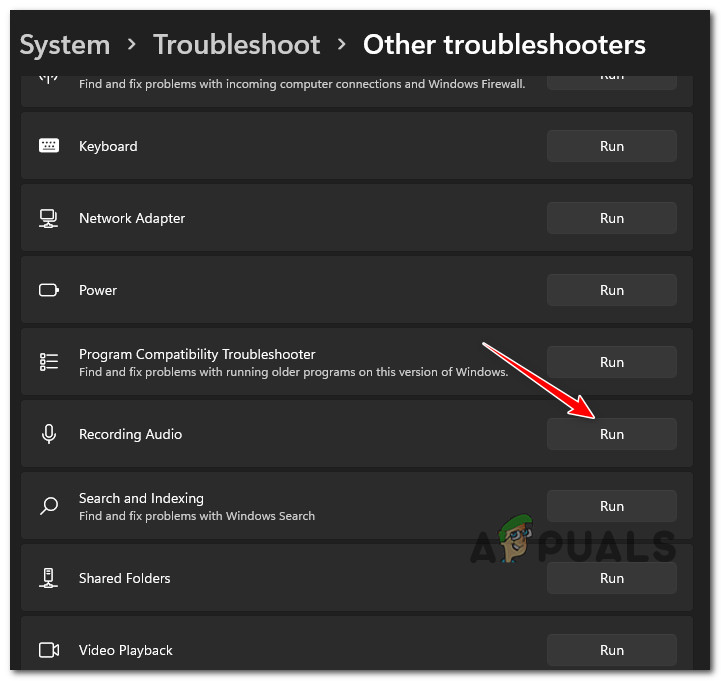
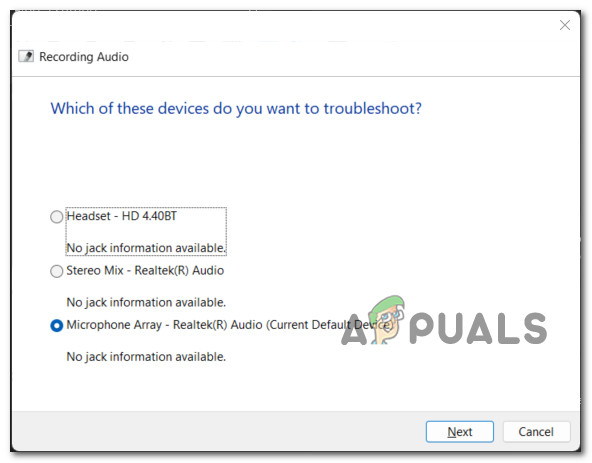
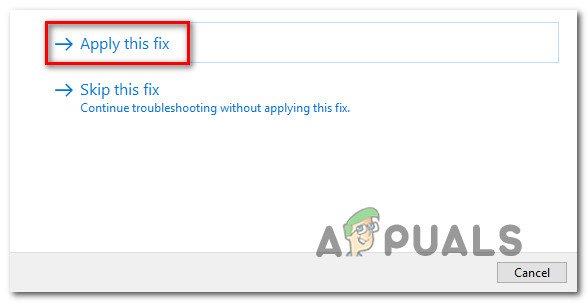
The ideal way to start this troubleshooting guide is to run an automated utility that is capable of diagnosing automatically fixing (in some cases) the underlying cause of the system’s inability to use the microphone. Microsoft has convenably included an automated troubleshooter specifically for microphone issues on Windows 11. It’s called the Recording Audio Troubleshooter and it contains a selection of automated repair strategies that your OS will be able to apply automatically in case a recognizable scenario is identified. Note: This method is not guaranteed to fix your microphone issues, but it’s a great place to start if you’re troubleshooting and hoping for the easiest resolution. Follow the instructions below to run the Recording Audio Troubleshooter on your Windows 11 computer and see if this allows you to resolve the issue: If this method did not fix the issue or no applicable fix has been recommended, move down to the next method below.
Allow Access to Microphone
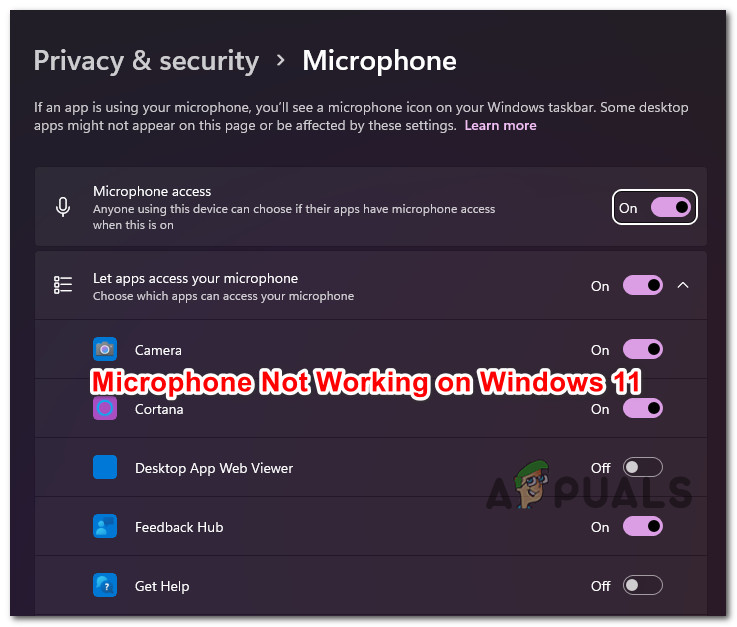
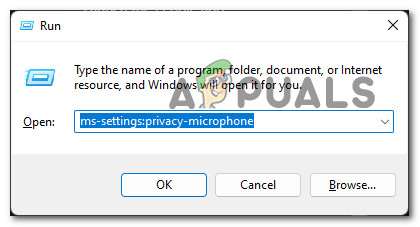
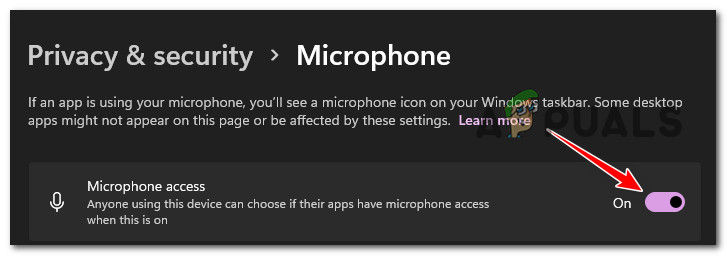
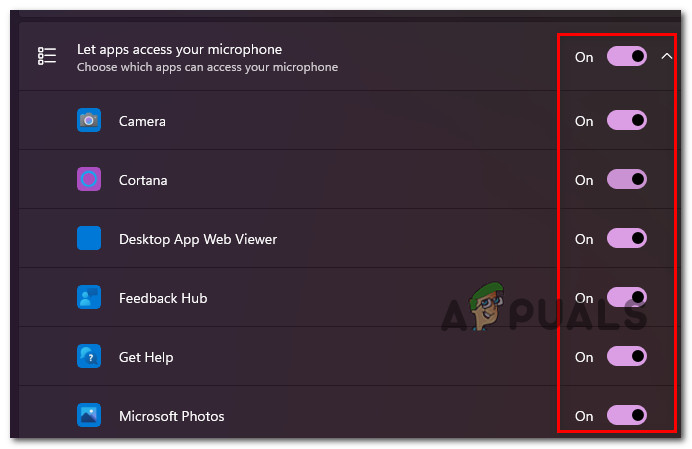
If the Recording Audio Troubleshooter above did not make a difference in your case, the next thing you should investigate is a permission issue caused by Windows’s strict privacy rules around the camera and microphone usage. In case you’re only experiencing this issue selectively (with certain apps), you’re most likely dealing with a privacy issue that can be rectified easily from the Privacy & Security tab. You will need to ensure that the Microphone access is allowed across this PC, then check the allowed apps individually and ensure that the app you’re having issues with is allowed to use the microphone. For step by step instructions on how to do this, follow the instructions below: In case you already had the required privacy permissions for your microphone and this method was not effective in your case, start following the next one below.
Ensure that the Recording Device is Enabled
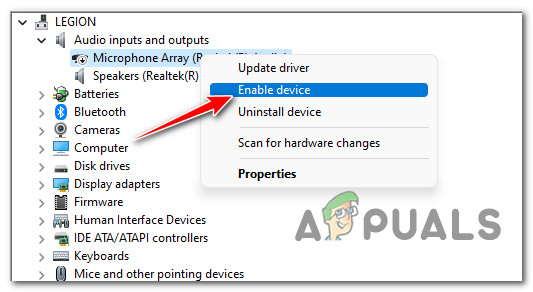
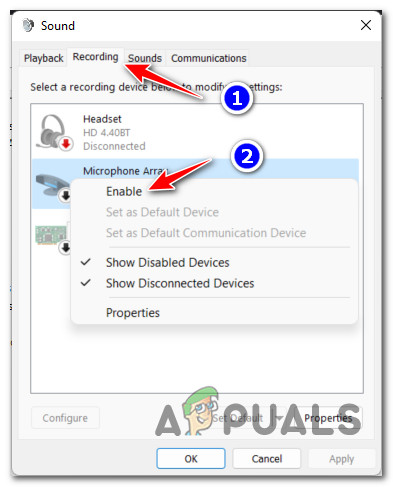
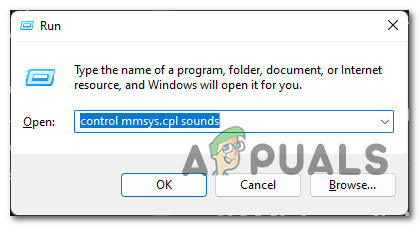
Now that we’ve ruled out a privacy issue from our potential culprit list, the next thing you should do is check whether your microphone device is actually active and see if it’s not disabled at a system level. There are actually two different locations that you should look into: Follow the instructions below for a step-by-step guide that will allow you to make sure that your microphone is not actually disabled at a hardware or software level: In case you’re still unable to use your Microphone on your Windows 11 computer, move down to the next potential fix below.
Set the correct microphone as the default (if applicable)
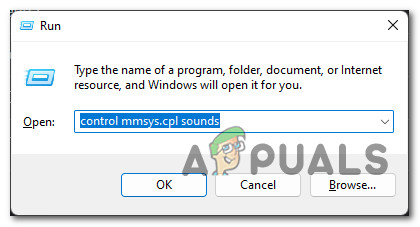
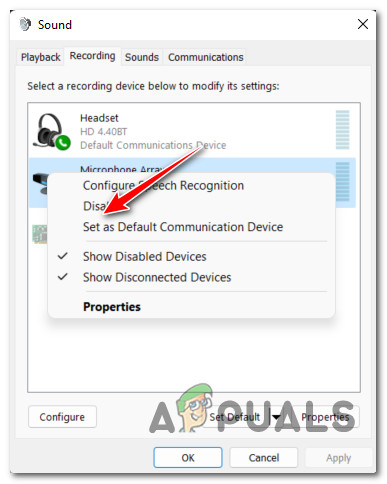
Keep in mind that in case you’re a laptop, ultrabook, or notebook, your PC should have a built-in microphone. This is not a problem unless you end up connecting an external microphone. If you currently have two microphones that might theoretically be active at any given time, you need to check which microphone is currently set as the default. It’s possible that the reason why you’re not getting any recorder audio from your microphone, you should see which microphone is currently set as the default. In case you discover that a different microphone (than the one you’re actively using) is set as the default, you can rectify this issue by using the Sound menu to set the correct microphone. Follow the instructions below to see if this method is applicable: In case you’re still not able to use your microphone, move down to the next method below.
Update Microphone Drivers
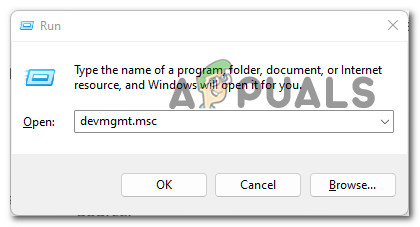
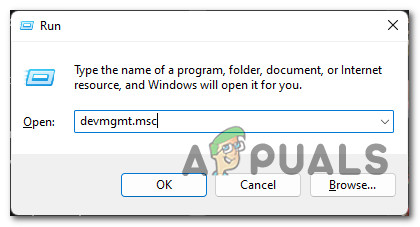
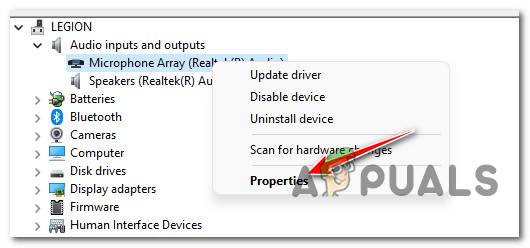
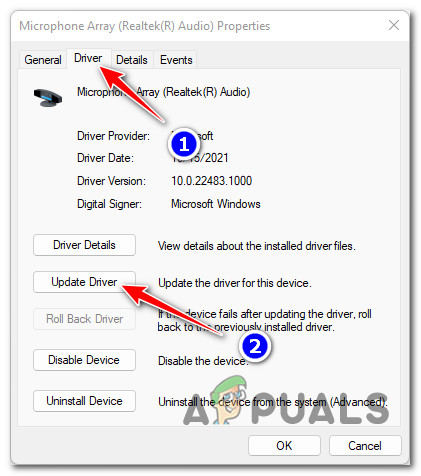
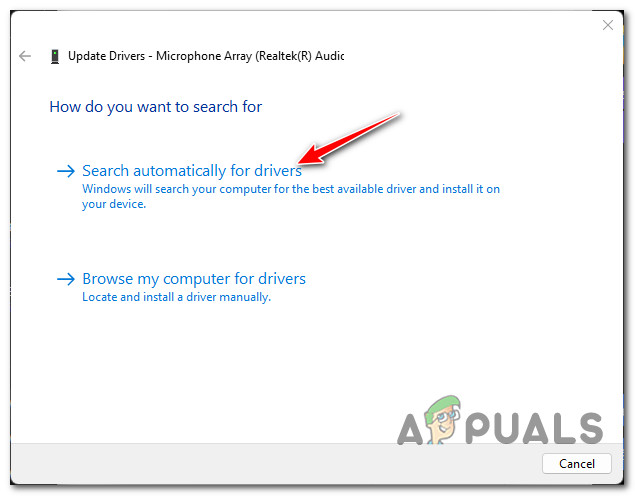
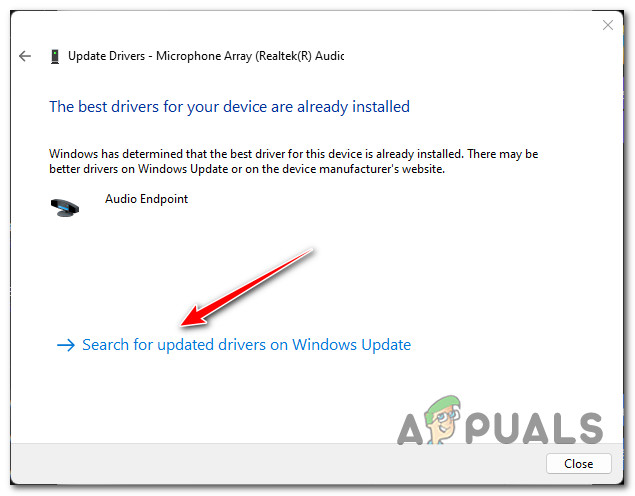
It’s not uncommon to deal with this issue if you’ve just finished the upgrading process to Windows 11 and your operating system has not yet updated the recording driver. Keep in mind that while most Windows 10 recording drivers are compatible with Windows 11, some aren’t. If you find yourself in a scenario where you’re stuck with an outdated recording driver that’s partially incompatible, you should be able to fix the issue by using Device Manager to install the latest compatible driver version. Follow the instructions below for step-by-step instructions on how to do this: In case the same problem is still ongoing or neither of the utilities above has managed to find a new version, move down to the next method below.
Update the Group Policy (if applicable)
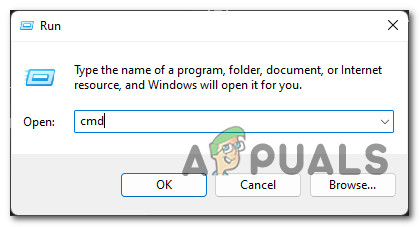
In case you’ve started dealing with this issue immediately after you completed the upgrade to Windows 11 from an older Windows version that was part of a local network with custom group policies, chances are this might impact your ability to utilize external peripherals like a microphone. In case this scenario is applicable, you should be able to fix the issue by forcing an update to the entire fleet of local group policies – this can be done from an elevated Command Prompt. Follow the instructions below for instructions on updating the group policy from an elevated Command Prompt: In case the issue persists, move down to the next potential fix below.
Run SFC and DISM scans
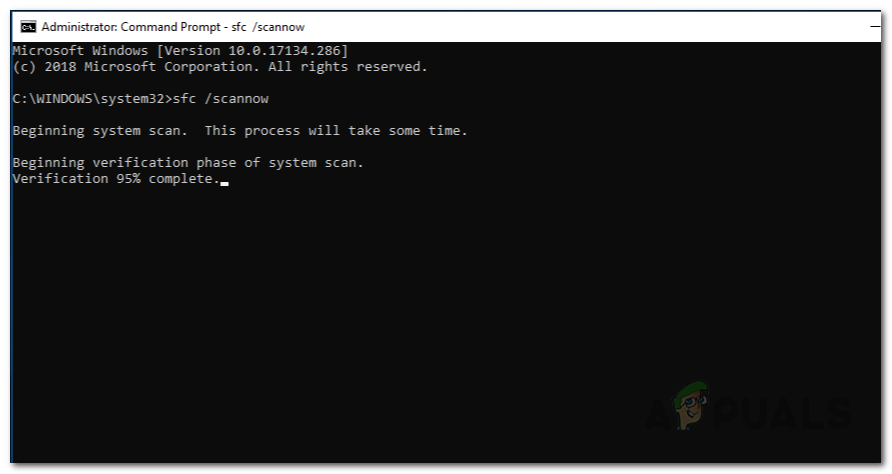
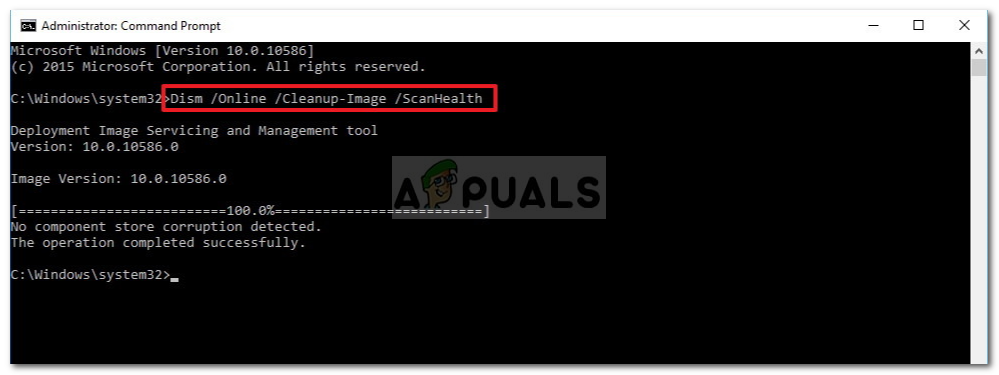
If you’ve come this far without a result, chances are you’re dealing with some kind of system file corruption that is somehow affecting your PC’s ability to utilize the default microphone. Several affected users that we’re also dealing with this problem have confirmed that the issue was finally fixed after they did a system-wide scan with SFC (System File Checker) and DISM (Deployment Image Servicing and Management) and replaced every corrupted system file with a healthy equivalent. Our recommendation is to run both of these scans in quick succession to maximize your chances of success. Start with an elevated System File Checker scan. Note: You won’t need Internet access to deploy an SFC since this is an entirely local tool that will use a locally stored archive to replace file corruption with healthy equivalents. Once the SFC scan is complete, reboot your PC and wait for Windows 11 to boot back up before deploying a DISM scan. Note: This operation will require access to the Internet – instead of using a locally-cached archive to replace file corruption, DISM relies on a sub-component of Windows Update. Once both of these scans are complete, do one final system restart and see if your microphone issues are not fixed. In case the same issue is persisting, move to the final potential fix below.
Perform a repair install
If none of the solutions featured in this article have proven to be effective in your case, it’s clear that you’re dealing with some kind of system file corruption that you won’t be able to resolve conventionally. If it comes to this point, you really have two ways forward:
Repair install – This is the preferred approach if you have access to compatible Windows installation media. By performing a repair install (in-place repair) procedure, you will be able to replace every Windows file with a healthy equivalent without producing an effect on your personal files, applications, and games.Clean install – If you’re looking for a fresh start, this is the way to do it. But keep in mind that unless you back up your data in advance, you will lose any personal file that’s currently being stored on the same partition as your OS.
FIX: Microphone Not Working After Windows 10 UpgradeFix: Logitech G430 Microphone Not Working on Windows 10Fix: AirPods Pro Microphone Not Working on Windows 10/11How to Fix Microphone Not Working in Windows 11/10?
