After investigating this particular issue, it turns out that there are several different underlying situations that are known to cause this particular error code. Here’s a list of potential culprits that might be responsible for this issue: Now that you know every potential culprit that might be responsible for this issue, here’s a list of verified methods that other affected users have successfully used to get to the bottom of this issue:
Method 1: Reinstalling the Java Environment
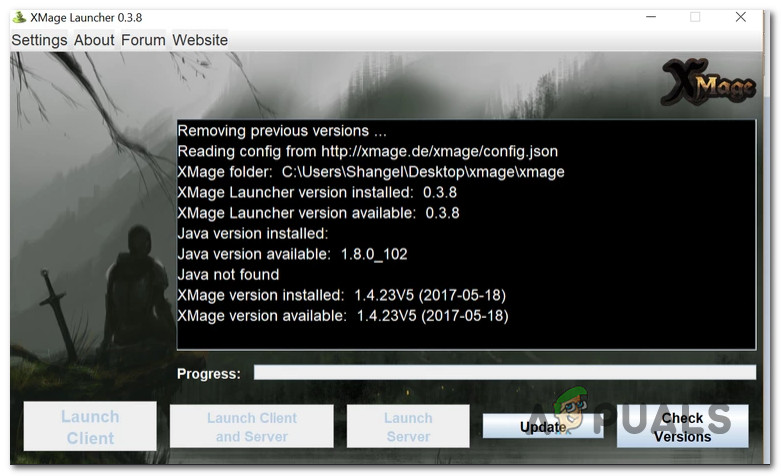
Since the most common causes that are known to cause the ‘Java Not Found’ with the Xmage program is an inconsistency with the Java installation. Whether this is due to some kind of corruption or you’re seeing this issue because the Java Environment path is different than the one specified in the Home Path, this operation should correct the issue. Several affected uses have confirmed that reinstalling the entire Java Environment allowed them to finally play Magic using the XMage platform without encountering the same error when using the launcher. If you haven’t tried this fix yet, follow the instructions below to reinstall the Java environment: In case the launching attempt ends in the same ‘Java Not Found’ error, move down to the next potential fix below.
Method 2: Removing remnants from old Java Installation (if applicable)
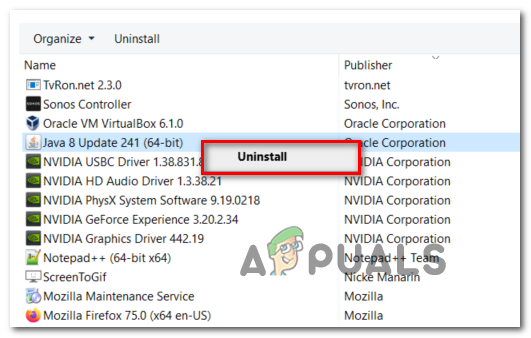
As it turns out, you can also expect to encounter the ‘Java Not Found’ error in those instances where your computer contains remnant with an older Java installation that end up interfering with the installation of the latest java version (handled by the XMage program). Several affected users that were dealing with the same issue have confirmed that they finally managed to fix the issue after they used an elevated Command Prompt to find the remnant Java filers and delete the main executables before launching XMage once again. If you haven’t tried this method yet, follow the instructions below to receive step by step instructions: In case the same problem is still occurring even after following the instructions above, move down to the next potential fix below.
Method 3: Fixing the Java Environment Variable
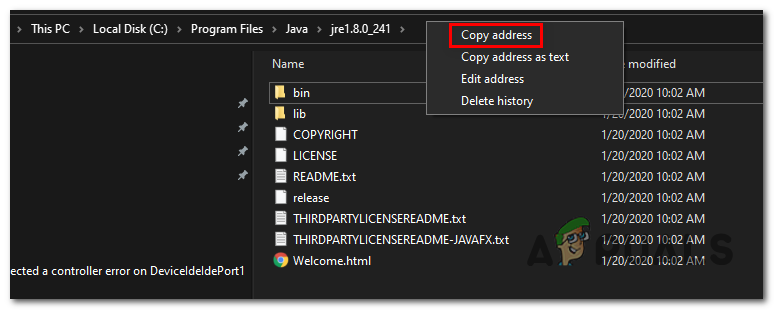
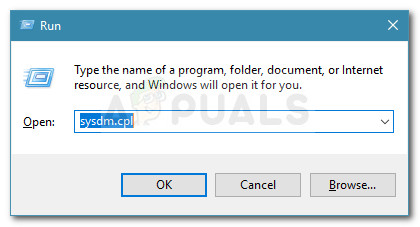
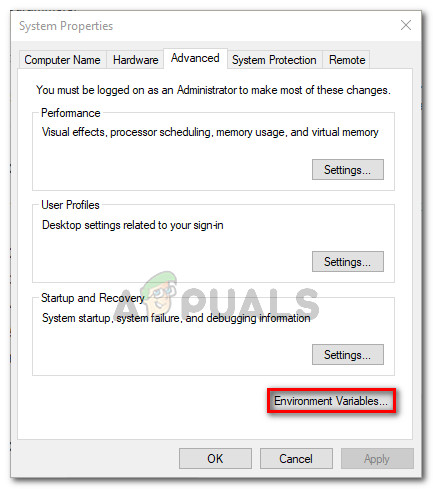
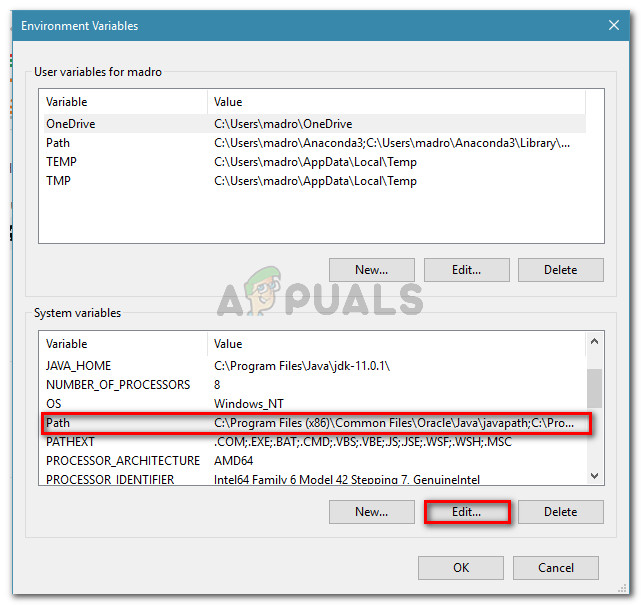
As it turns out, you can also expect to see this particular issue popping up if you have an incorrect Java environment variable that is giving the XMage launcher the impression that the Java dependencies aren’t installed when in fact they are. If you find yourself in this scenario, you should be able to fix the issue by fetching the location of your Java installation and ensuring that the Java environment variable points to the correct location – This fix was confirmed to work by a lot of affected users. If you haven’t tried out this fix yet, follow the instructions below:
Fix Error Could not find Java SE Runtime EnvironmentFix: Windows Error 2 Occurred While Loading the Java VMHow to Fix Java Error 1721 on WindowsFix: OneDrive Java Script Error on Windows 10