It doesn’t make a difference whether your printer interfaces by means of USB, Ethernet or Wi-Fi – this trick will at present work. Now, Let’s move towards setting up the Raspberry Pi, installing necessary packages on it and making certain hardware changes!
Step 1: Make Sure That Raspberry Pi Is Up To Date.
Keep the sources of your Pi up to date otherwise, the outdated software will cause some problems. Enable the Virtual Network Computing (VNC) viewer on your Pi, then connect your Raspberry Pi with the VNC viewer. The link is provided below for downloading VNC and then connecting it with Pi. VNC Now, open the terminal and run the following command : then, If any updates are installed, press Y and then press Enter to continue downloading updates. When that is done, you can begin introducing your gadget.
Step 2: Connect Your Printer with To Pi’s USB Port.
There are two options. You can connect the printer either using a USB cable or via ethernet or either Wifi. If you are using ethernet or Wifi, ignore this step and directly move towards step 3. Connect the printer via USB cable and reboot the Pi using the following command : After rebooting, run the terminal and run : All devices that are associated with the means of USB ought to be displayed now. On the off chance that your printer doesn’t appear, ensure it is turned on and working properly.
Step 3: Install samba and CUPS.
Now, we can start installing the software that will provide the printer networking. In the terminal run the following commands : Numerous packages will be installed and if asked press Y and then Enter to install them properly. After the packages are installed run: Most probably we’ll see apt wanting to install the combination of packages. There is no need to panic and carry on as done previously. From that point forward, we simply need to include a printing administrator with the goal that CUPS can manage printers on the Pi. Run the following command :
Step 4: Add Your Printer.
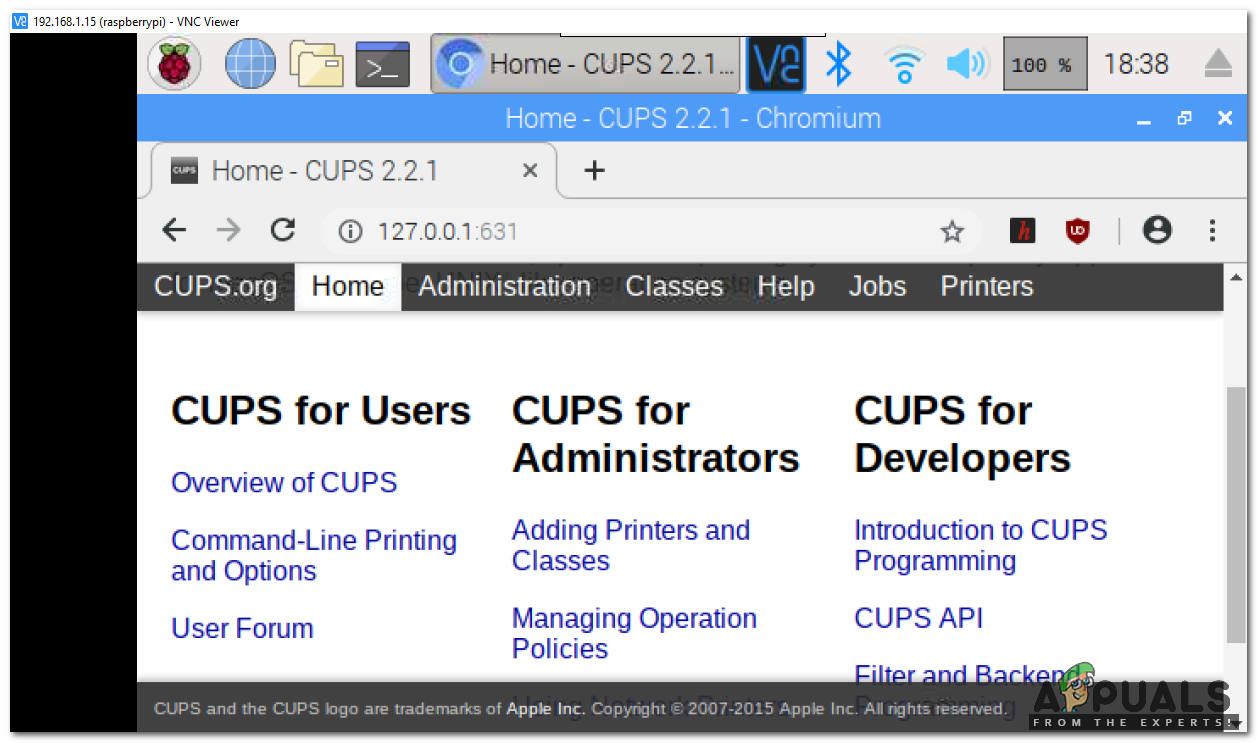
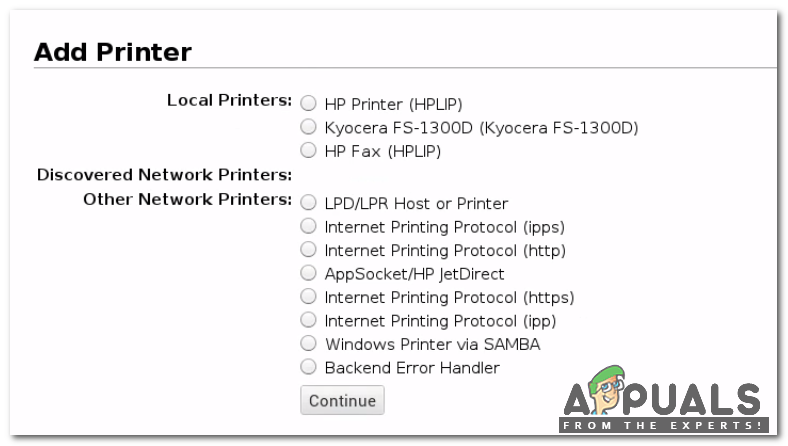
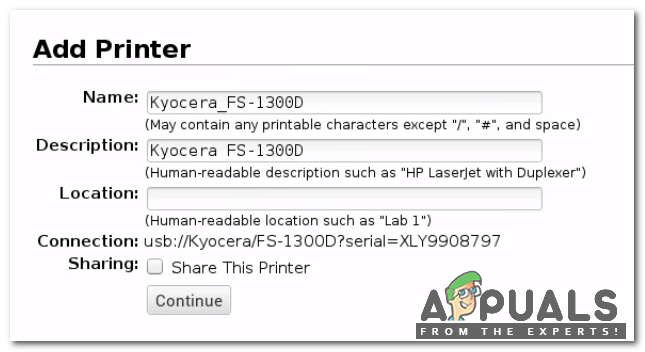
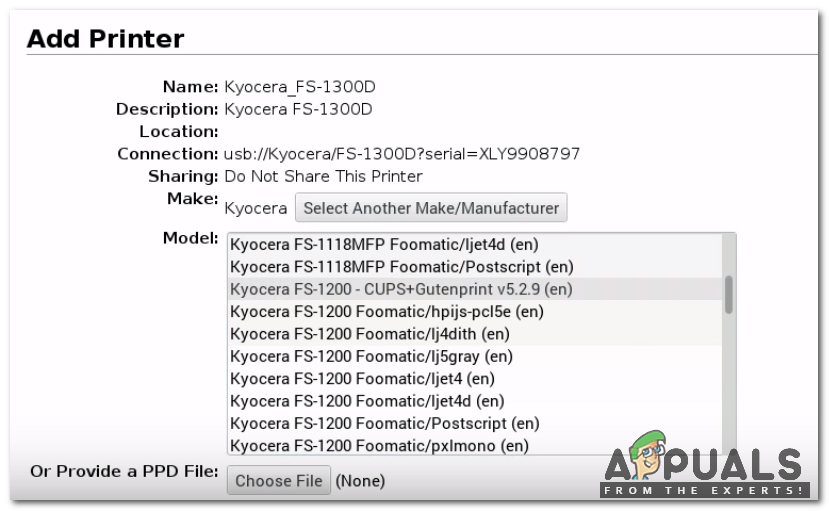
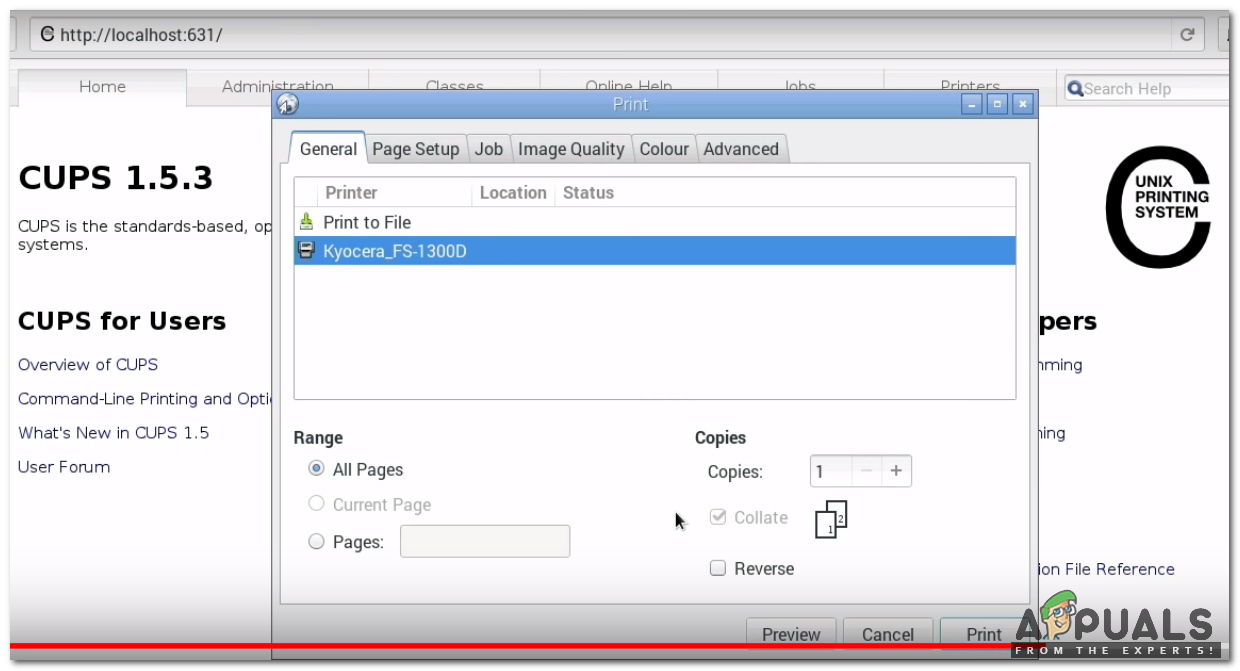
We presently need to add your printer to your print server. To do this, we will have to explore to the CUPS User Interface. Open the web browser on Pi and run the IP : 127.0.0.1:631. The result should be like this : Click the ‘Administration tab’ and then click ‘Add printer’. We might be asked to switch to SSL and we will follow the link if told. After that, we will be prompted to log in. We will use the default login details that we use to log in to VNC or the customized details if we’ve changed them.
Step 5: Fine-Tune Some Settings.
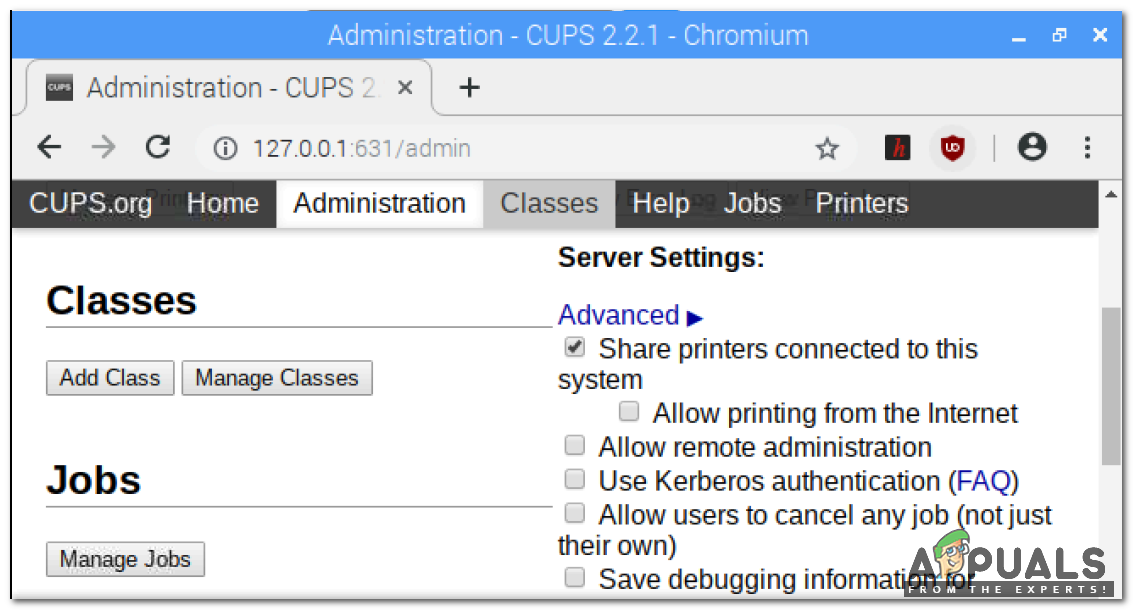
Performance can be made better by fine-tuning some settings. Go to the Administration tab and look for Share printers connected to the system. If we want to add new printers remotely in the future over our network check for Allow Remote Administration. Click on change settings and the server will reboot.
Step 6: Add Samba Support For Windows Networking (Optional).
Samba for windows should be activated if someone wants to use this printer with a Windows device. For that run the following command: Now, move to the bottom and paste the following : Now, press CTRL + W and type in workgroup followed by Enter to find workgroup configuration. Most probably your workgroup is already set and rarely there is a chance that you’ve changed your workgroup before – if you have, set the correct name at workgroup =. Then change wins support = no to wins support = yes. Then press CTRL + O, followed by Enter to save the configuration. After that restart the samba with the following command : All set, now our printer will work on the Windows network.
Step 7: (If your Raspberry Pi is connected to your network via Wi-Fi) Change a quick setting here.
As displayed in the start we are using Raspberry Pi Zero in this project so our Pi is connected to the network via Wifi. Those who own the latest models of Pi which are connected via Ethernet cable should ignore this step. Our raspberry model uses Wifi so we need to turn off the power saving for its Wifi adapter to prevent it from going to sleep and isolating AirPrint. For this task, we need to edit a file in the Terminal : Add the following at the bottom : Now press CTRL + O for the changes to take effect followed by Enter.
Step 8: Install Bonjour for AirPrint.
About there, I guarantee! We currently need to introduce AirPrint software. Run the command in the terminal : Now we will reboot our Pi :
Step 9: Testing.
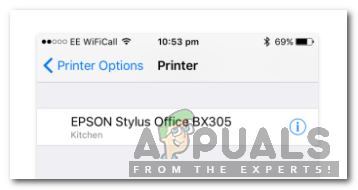
Now all the necessary configurations are done. Grab an iOS device, open up email or Safari page and click on Share option until we find a Print option. Hit Select Printer and it should (decently fast) show up. Select your printer, modify any inclinations you wish, and afterward click on Print. An AirPrint printer with a little configuration from your Pi is now ready. Regardless, you should now have a printer that works over your system and on the majority of your preferred iOS gadgets, without the requirement for any outsider application!
How to Turn USB Printer into a Wireless Printer using Airport ExpressHow To Make Home Theater Using Raspberry Pi?How To Make IOT Smart Garage Opener Using Raspberry Pi?How To Perform Video Streaming Using Raspberry Pi?