In this guide, I will walk you through the best methods of achieving screen mirroring on a PC. If you have recent PC and a Smart TV, you might be able to cast your content to a bigger screen without having to buy an external adapter. If you’re looking for a way to set up a wireless screen mirroring from a PC to a bigger screen, follow one of the methods below. If you want to avoid spending any money on an additional adapter, follow Method 1 and see whether your equipment supports it.
Method 1: Wirelessly mirroring your laptop/PC to a TV (no adapter)
If your laptop is relatively new (you bought it in the past 3-4 years), there’s a high chance that it supports the Miracast technology – this is what’s needed to cast content from a PC to a TV without an adapter. This method will only work on Windows 8.1 and Windows 10, and you’ll need a smart TV to go along with it. In order for this to work, you’ll need to have the latest Micracast wireless display drivers which are handled by WU (Windows Update). With this in mind, make sure your operating system is up to date in order to ensure that the drivers are installed. Note: Keep in mind that installing the latest OS updates does not guarantee that this method will work. The Miracast technology is likely not supported on older laptops and PCs. Follow the steps down below to screen mirror your laptop to a Smart Tv without an adapter:
Method 2: Wirelessly mirroring your laptop/PC to a TV (with an adapter)
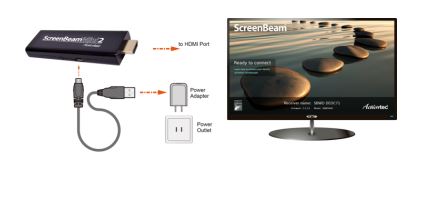
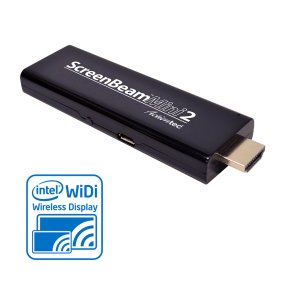
There are a lot of different adapters capable of mirroring your PC/laptop screen wirelessly. But if you’re looking for a reliable and cost-effective way to do it, ScreamBeam Mini2 is arguably your best option. This is partly true because ScreenBeam Mini2 uses the same Micracast protocol that was featured in Method 1 – which works very well on almost all Windows versions. ScreamBeam Mini2 is basically a mini adapter which you can connect to your HDTV that allows you to wirelessly share your content. This device is compatible with Windows 8.1, Windows 8, Windows 7, WiDi, tablets, smartphones, and Miracast. The device creates a direct 2.4/5Ghz connection, so you do not need to have an existing Wi-Fi network. ScreenBeam Mini 2 is compatible with the following:
Windows 8.1 systems and mobile devices with Miracast support.Windows 10 systems and mobile devices with Miracast support.Windows 7, 8 (or later) systems with Intel WiDi Software.Windows 7, 8 (or later) systems with a USB transmitter and the ScreenBeam Kit software.Android phones and tablets with native Miracast support (Android 4.2 and above).
So how does it works? Super-easy.
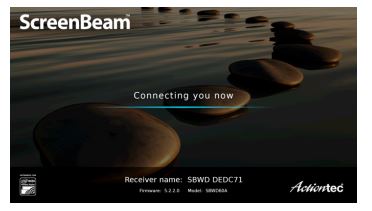
Verify that the “Ready To Connect” screen appears on the HDTV. The Receiver is now connected to the HDTV monitor and is ready to use.
To connect a Windows 8/8.1/10 Computer:
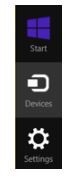
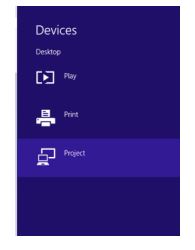
From the Windows desktop, go to the Charms menu and select Devices. You can also use the shortcut keys (Windows logo + K). Note: On Windows 10, the shortcut (Windows logo + K) will take you directly to the Devices menu where you can click on the ScreenBeam Mini 2 receiver to start the connection. If you’re on Windows 10, you can skip straight to step 5. But in case you don’t see the receiver listed under devices, follow this link (here) and download the latest available software. Also, make sure all you allow are your pending Windows updates. When the Devices menu appears, select Project.
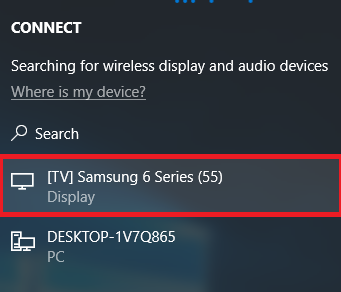
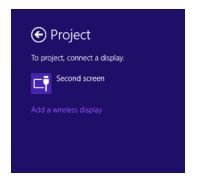
When the “Project” menu appears, select Add a wireless display. Windows will search for available devices.
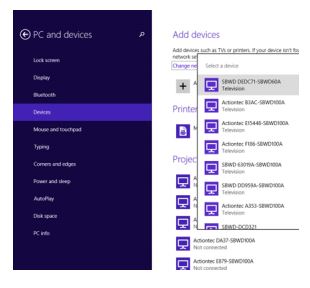
A “PC and devices” screen appears. Click Devices and, from the list that appears, select the Receiver.
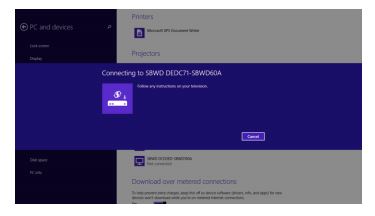
The Windows 8.1 device connects to the Receiver.
The HDTV/4KTTV displays a message to show the status of the connection.
When the last screen, above, is displayed, the device has connected to the Receiver. The device’s screen should be displayed on the HDTV/4KTV.
Display Mode
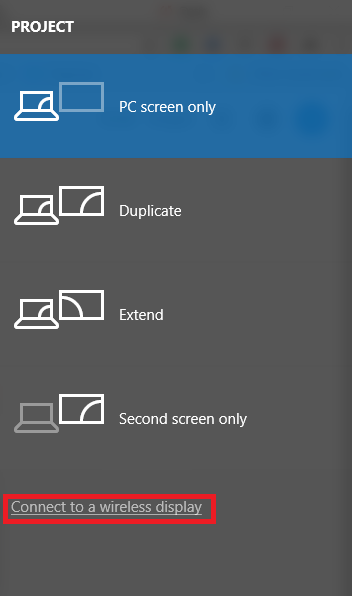
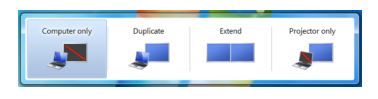
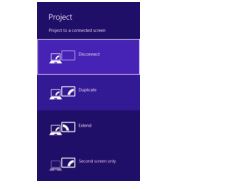
ScreenBeam Mini 2 supports three display modes when connected with a compatible wireless display application (Intel WiDi or Windows 8.1 Project, for example). In Windows (8, 8.1 and 10), press the Windows logo + P keys simultaneously to launch the display options and select the desired display mode from the options.
Duplicate
The Duplicate mode is used to display the same content on both the device’s screen and the HDTV simultaneously. Note: There may be a minor delay between the content displayed on the HDTV screen compared to the device’s screen. This is due to the current state of wireless display technology.
Extend
The Extend mode creates a single, extended “screen” between the source device and the HDTV. When in Extend mode, dragging windows to the right side of the device’s screen displays those windows on the HDTV, while dragging windows to the left of the HDTV screen displays them back on the device’s screen. This mode allows users to display selected content on the HDTV, while all other windows remain on the device’s screen. When this mode is first selected, the HDTV displays only the Windows desktop.
Second Screen Only
The Second Screen Only mode causes the HDTV to be the only display for the device. All content will be displayed on the HDTV; the source device’s screen will be blank.
How to Connect Android to Wireless ADB for Wireless Screen MirroringHow to Fix Roku Screen Mirroring not Working on Windows 10What is ‘Modern Setup Host’ and How to Fix High Disk Usage by Modern Setup Host?How to Setup Out Of Office replies in Outlook 2013/2016 and 2010