We all know the Windows Homegroup that lets you share files over a network without any great hurdle. However, it has been removed from Windows 10 in the v1803 update due to which alternate resolutions are required. A quick workaround would be to use a TFTP Server, it’s simple and easy to set up. In this article, we’ll be using the SolarWinds TFTP Server (download here) which is pretty easy to use and it lets you transfer files with reliability and at a fast speed over a network. We also recommend using SolarWinds TFTP Server since they are a specialist company, specifically developing softwares and solutions for large organisations to help manage there networks, systems and IT infrastructure.
Prerequisites:
Before we get into the essence of the article and show you how to set up your TFTP server, there are certain things that you will be requiring. Here’s what you need — Once you have met all the requirements, you are ready to setup the server.
Remote Access or Local Access
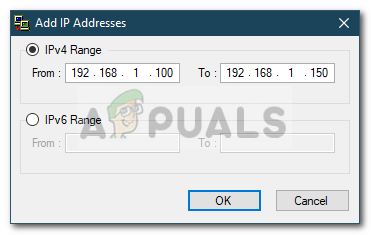
If you have decided to allow access to the TFTP server from outside your local network such as your Home or Office or anywhere else, you will need to ensure that you use a Static IP or have your Dynamic IP added to the white list, by default the TFTP server allows All IP Address to send and receive files along with Port Forwarded. You can add IP Range to allow multiple IPs or a shortened range to allow one device only as well. IP Configuration for Solarwinds TFTP
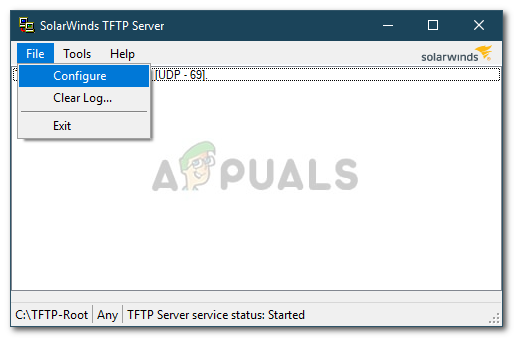
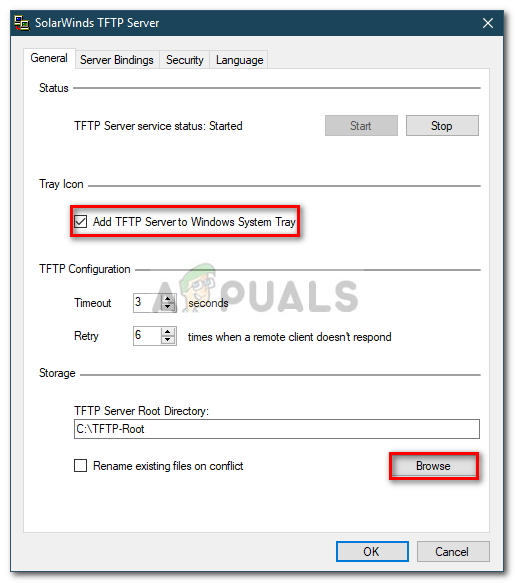
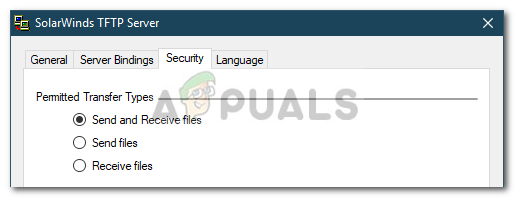
Setting up the TFTP Server
To setup the server, please follow the given instructions: That is it, you have successfully configured and setup your TFTP Server.
Using the TFTP Server
Now that you have setup a TFTP server, you might be wondering how to send or receive files using the TFTP server. Don’t worry, we are going to illustrate the procedure here. Port Forward – To start it off, you will first have to make sure to forward the port number 69 if you want systems outside the network to access it. Port forwarding is usually different for different firmware, therefore, we can’t cover them all. However, to give you the basic insight, you will have to access your router’s control panel, go to Advanced Setup and locate NAT or Port Forward. There, just make a new entry and forward the UDP port 69 on your ipv4 address. Please note that if you don’t intend to transfer files remotely, you do not have to forward any ports.
Installing TFTP Client
The next step would be to install the TFTP Client on the remote or local system. To install the TFTP client, do the following: Remember that this has to be on the system which isn’t running the server.
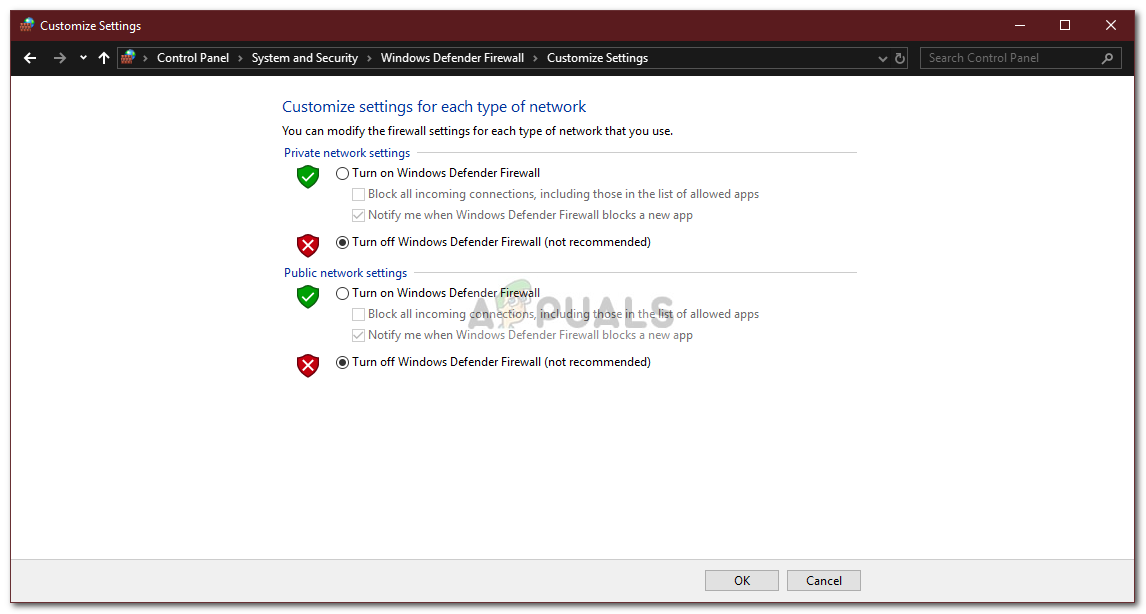
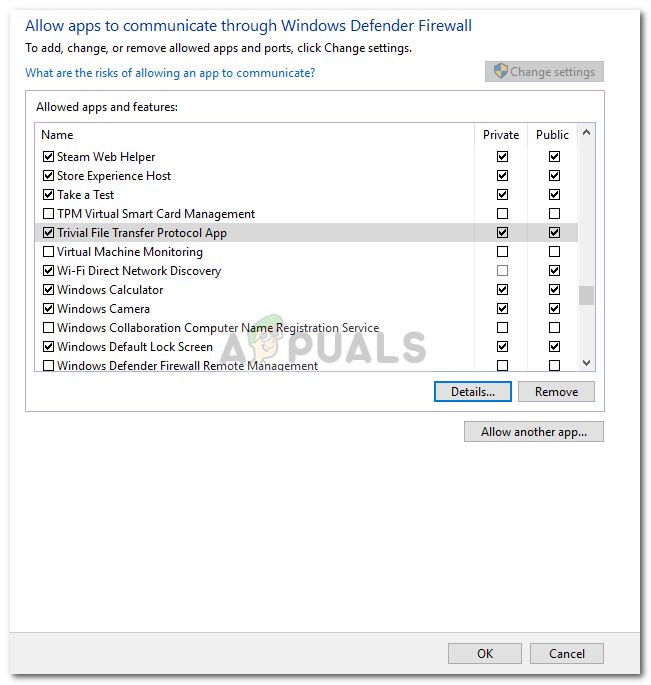
Configuring Firewall to Allow TFTP
After you have installed the TFTP client on your system, you will either have to turn off Windows Firewall or add an exception for the TFTP connections. Here’s how to do it:
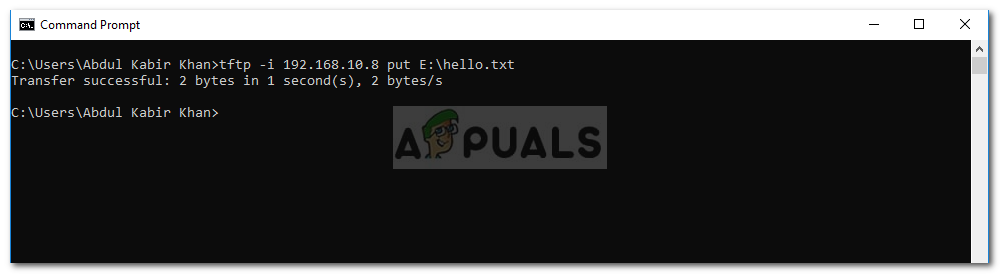
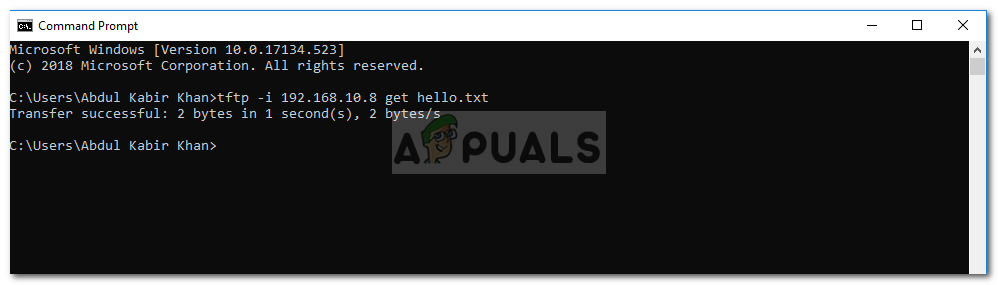
Transferring Files using TFTP
Finally, after installing the TFTP client and forwarding UDP port 69, you are ready to transfer files remotely or locally. To do this, make sure the server is running and then follow the given instructions: If you want to transfer files remotely, you will have to specify the public IP address in the command prompt followed by the port. An example would be:
How to Backup Your Router Configurations to TFTP Server?How to Setup and Configure a Wireless Printer in Windows 11How to Setup and Configure your Android SmartwatchFix: Windows Setup could not configure Windows to run on this computer hardware