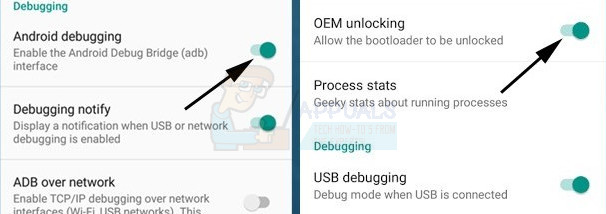
Before you continue with the steps listed in this guide; you acknowledge and accept that any damage to your phone caused by your attempts to root your phone is your own responsibility. Appuals, the (author) and our affiliates will not be responsible for a bricked device, dead SD Card, or anything to do with your phone. If you don’t know what you’re doing; please research and If you do not feel comfortable with the steps, then DO NOT PROCEED. What you’ll need: 1) Your Xperia XA 2) A USB cable 3) A laptop First you need to check what model do you have and if your boot-loader is unlock-able, to check the model go to Settings → About phone and you should be able to see your model number, also notice your IMEI number, write them down because we will need them. And while you are at it, you should enable developer option by clicking on Build Number 7 times, go back to the Settings menu and enter developer options and enable USB debugging. (or android debugging)
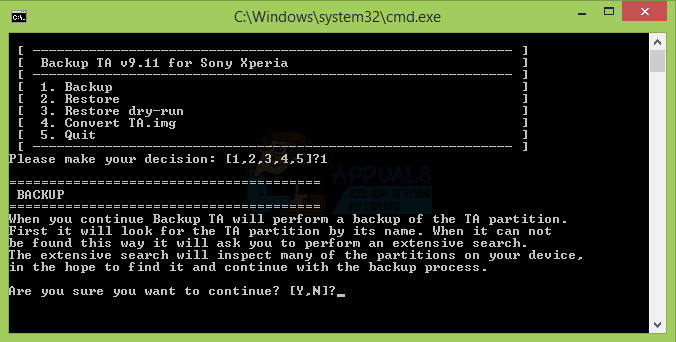
Next go to the phone application, type this number ##7378423## then tap on Service info → Configuration → Rooting status, if the Boot-loader unlock says yes then your phone is unlock-able and you are ready to go, if not then it isn’t and you should stop reading. Before we continue, do know that unlocking your boot-loader will wipe your phone clean, so before unlocking you should make sure you Backup all the data that matters to you. Next we will need to install your drives, download the adb drivers from here then the fast boot drivers from here and install them all. We will now make a backup of your DRM keys, these are the keys provided by sony to use some of their optimizations like X-reality and low light pictures. All you need to do is download this script, unzip it and run the “backupTA.cmd” as administrator.
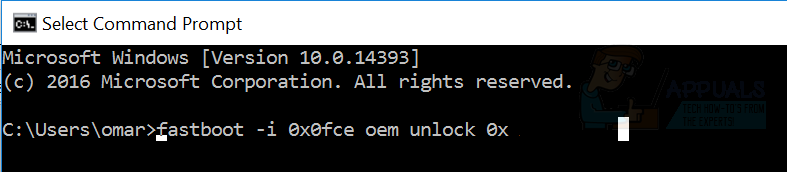
You should install minimal fast boot and ADB, you can find it in this link. After you download it follow the installer’s instruction and create a shortcut on the desktop, Once we’ve done the backup, we can complete rooting our phone, you need to go to the Sony boot-loader unlock website, and follow the instructions they set to you, once done you will have a code. Shut down your phone and press Power + Vol up to boot it into fast boot mode, then connect it to your PC using a USB cable, open a command prompt (search cmd on your start menu) and run as administrator, then type in “fastboot devices” if your phone shows up then you are ready, next type in this code. “ fastboot -i 0x0fce oem unlock 0x “PASTE YOUR UNLOCK CODE HERE” ”
Once the phone is done, it will reboot. Now you will need to install one of these two zip files, depending on your model number. For: F3111, F3113, F3115 Download this one. For: F3112,F3116 Download this one. After you unzip them and with your phone connected to the PC, copy the “SUPERSU” zip file into your phone’s microSD card. again power off the phone and boot it into the boot-loader mode, copy the “Boot.img” and the “Recovery.img” and paste them into the desktop, where you installed your ADB file. Open the a command line in the folder and type in these commands. “fastboot flash boot boot.img” and “fastboot flash recovery recovery.img”
once you’re done unplug the phone from the pc and press on Power + Vol Down, you will now boot into TWRP’s recovery, when prompt for the password, press cancel and then “Keep read only”, then open install, navigate to where you put the “SUPERSU” file and install it, now you are rooted and done!
How to Unlock and Root Sony Xperia XA2How to Backup and Restore Sony Xperia Z+ DRM Keys and Keep DRM Functionality…How to Flash Cyanogenmod 12.1 On Your Sony Xperia ZHow to Root Your Nexus Phone using CF-Auto-Root