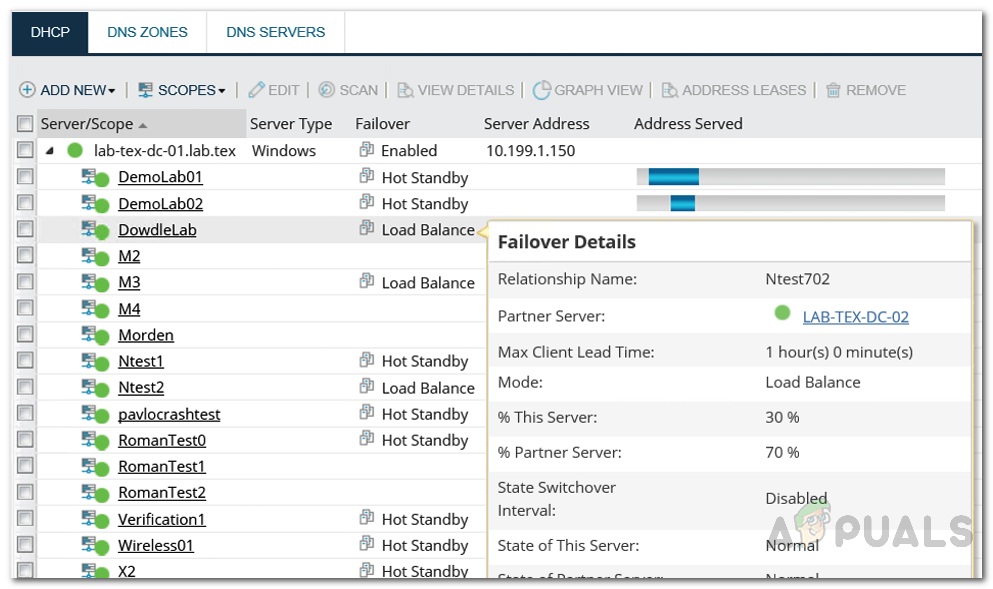
DNS and DHCP servers can sometimes come at conflict as both are unaware of the actions of the other. This means that a DNS server does not know which IP address has been assigned to which device in the entire network as well as what are the available IP addresses. In the same fashion, DHCP is unaware when DNS (Domain Name System) is running out of IP addresses. This way, IP address conflicts due to duplicate IP addresses tend to arise most of the time. Therefore, this is where an IP address management software or IPAM tools chime in. It helps you track the IP addresses that have been assigned to the various devices connected as well as identify unauthorized nodes that might have slipped in. It also helps network engineers to ensure that the IP address assignment procedure goes smoothly. Solarwinds IP Address Manager offers you that along with much more functionality that you can take advantage of. Other than tracking the IP addresses on your network, it also lets you monitor and manage a DHCP server as well as a DNS server separately. An IP address management system also alerts you of any issues that pop up along with a whole lot of integrated suite of tools. This is one of the advantages of using an IP address management solution.
What do you need?
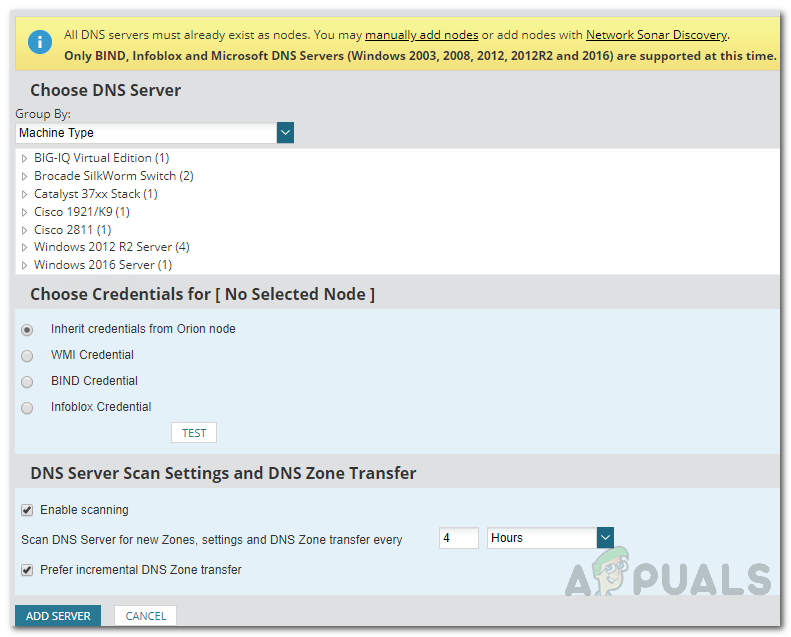
To be able to follow this guide through, you will have to deploy the Solarwinds IPAM tool (download here) in your network. IP Address Manager integrates with the Network Performance Monitor to offer enhanced insight into your network. If you do not know how to do that, do not worry, we have an article already published on our site that will guide you through every step. Follow the “Track and Manage IP Addresses using IP Address Manager” article on our site to get going. Another thing to note here is that you have to ensure that you have the DNS server that you want to monitor separately added to Solarwinds IPAM as a node. This means you will have to add it to IPAM as a separate IP address as shown in the article above after which you will be able to monitor the node or DNS server individually. The DNS servers that are supported by IP Address Manager are Windows DNS servers 2008, 2003, 2012, 2012R2 and 2016. Other than that, Bind DNS 9.1 till 9.11n are also supported.
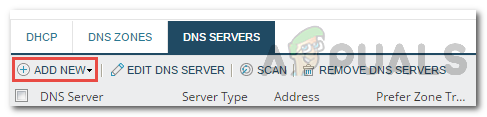
Adding a DNS Server
Now that you have deployed the IP address management tool in your network and added the DNS server as a node in IPAM, you can start to add the node as a DNS server. This is fairly easy to do via the very user-friendly interface Solarwinds provides through its Orion platform. Once you add the DNS servers, the DNS entries in Solarwinds IPAM will automatically be updated. Here’s how to do it:
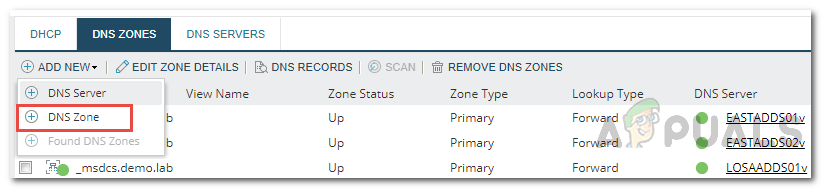
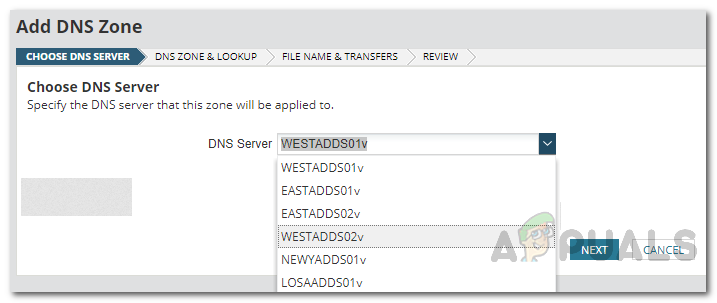
Adding a DNS Zone
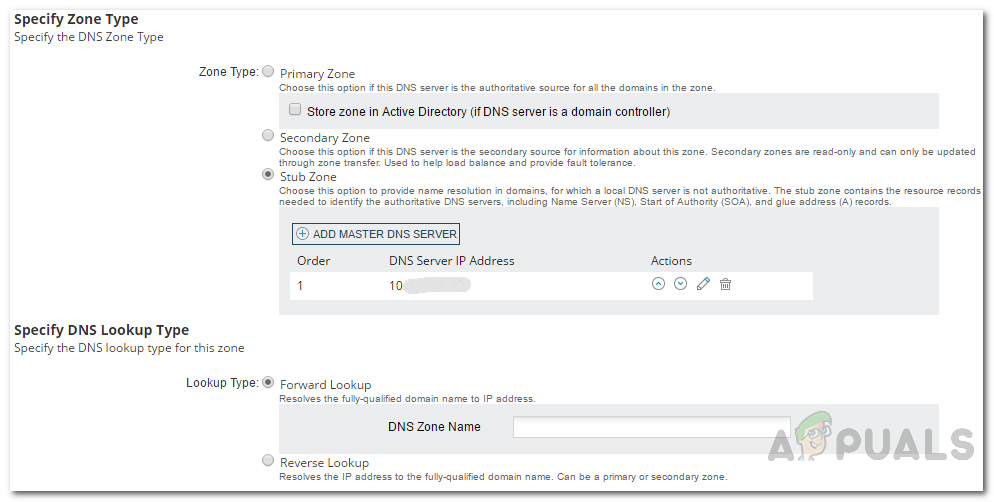
If you have a DNS server that has a DNS zone and the server has authority over the zone, you can add the DNS zone to IPAM as well. One single DNS server can have authority over multiple DNS zones. Three types of DNS zones are supported by IPAM i.e. Primary zone, secondary zone, and stub zone. Follow the below instructions to add a zone:
Editing and Removing DNS Servers or Zones
Once you have added DNS servers and the zones that you want to, you can change the details anytime you want to by accessing the DNS and DHCP Management page. From there, you can also choose to remove a DNS zone or server should you want to later down the road.
How to Manage and Request IP Address Requests in IP Address ManagerHow to Monitor and Manage DHCP Servers in IP Address ManagerHow to Scan your Local and Remote Subnets for MAC address, DNS, Network Card…How to Track and Manage the IP Addresses on your Network using IP Address…